Important NoteThis entire repo was AI created - including all of the data within. The intent was to A) help me with my personal electronics inventory; and B) see how I could use AI to make that process a bit easier. DO NOT TRUST!
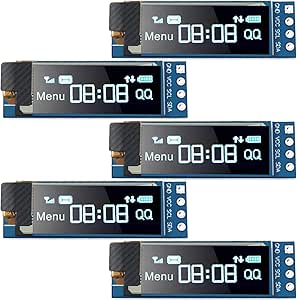
Frienda 0.91” I2C OLED Display Module
Details
- Location: Cabinet-1, Bin 21
- Category: OLED Displays
- Type: I2C OLED Display Module
- Size: 0.91 inch diagonal
- Resolution: 128x32 pixels
- Quantity: 5
- Product URL: https://www.amazon.com/Pieces-Display-Module-SSD1306-3-3V-5V/dp/B08CDN5PSJ
Description
Frienda 5 pieces I2C OLED display module with 0.91 inch screen size and 128x32 pixel resolution. Features SSD1306 driver chip with I2C interface for easy connection to microcontrollers. Self-illuminated OLED technology provides excellent contrast and visibility.
Specifications
- Display Size: 0.91 inch diagonal
- Resolution: 128x32 pixels
- Driver IC: SSD1306
- Interface: I2C (SDA, SCL)
- Display Color: Blue
- Operating Voltage: 3.3V to 5V
- Current Consumption: ~20mA (typical)
- Viewing Angle: >160°
- Operating Temperature: -40°C to +85°C
- Package: PCB module without pin headers
Image
Features
- Self-Illuminated: No backlight required, each pixel emits light
- High Contrast: Excellent visibility in various lighting conditions
- Low Power: Efficient OLED technology with low current consumption
- Wide Voltage Range: Compatible with 3.3V and 5V systems
- I2C Interface: Simple 2-wire communication (SDA, SCL)
- Compact Size: Small form factor perfect for portable projects
- No Pin Headers: Requires soldering of header pins for breadboard use
Pinout
- VCC: Power supply (3.3V to 5V)
- GND: Ground
- SDA: I2C data line
- SCL: I2C clock line
Wiring Diagrams
Arduino Uno Connection
OLED Display    Arduino Uno
------------    -----------
VCC        →    5V or 3.3V
GND        →    GND
SDA        →    A4 (SDA)
SCL        →    A5 (SCL)

Note: Arduino Uno has built-in I2C pull-up resistors
Raspberry Pi Pico Connection
OLED Display    Pico
------------    ----
VCC        →    3V3
GND        →    GND
SDA        →    GP4 (I2C0 SDA)
SCL        →    GP5 (I2C0 SCL)

Note: Add 4.7kΩ pull-up resistors on SDA and SCL if needed
ESP32 Connection
OLED Display    ESP32
------------    -----
VCC        →    3.3V
GND        →    GND
SDA        →    GPIO21 (SDA)
SCL        →    GPIO22 (SCL)

Note: ESP32 has built-in I2C pull-up resistors
Programming Examples
Arduino Code Example
#include <Wire.h>
#include <Adafruit_GFX.h>
#include <Adafruit_SSD1306.h>

#define SCREEN_WIDTH 128
#define SCREEN_HEIGHT 32
#define OLED_RESET -1
#define SCREEN_ADDRESS 0x3C

Adafruit_SSD1306 display(SCREEN_WIDTH, SCREEN_HEIGHT, &Wire, OLED_RESET);

void setup() {
  Serial.begin(9600);

  if(!display.begin(SSD1306_SWITCHCAPVCC, SCREEN_ADDRESS)) {
    Serial.println(F("SSD1306 allocation failed"));
    for(;;);
  }

  display.clearDisplay();
  display.setTextSize(1);
  display.setTextColor(SSD1306_WHITE);
  display.setCursor(0,0);
  display.println(F("Hello, World!"));
  display.display();
}

void loop() {
  // Your code here
}
CircuitPython Code Example
import board
import busio
import displayio
import adafruit_displayio_ssd1306
import terminalio
from adafruit_display_text import label

# Initialize I2C
i2c = busio.I2C(board.SCL, board.SDA)

# Initialize display
display_bus = displayio.I2CDisplay(i2c, device_address=0x3C)
display = adafruit_displayio_ssd1306.SSD1306(display_bus, width=128, height=32)

# Create text label
text = "Hello World!"
text_area = label.Label(terminalio.FONT, text=text, color=0xFFFFFF, x=28, y=15)

# Show on display
splash = displayio.Group()
splash.append(text_area)
display.show(splash)

while True:
    pass
Applications
- Arduino and microcontroller projects
- Raspberry Pi displays
- IoT device status displays
- Portable instruments
- Data loggers
- Weather stations
- Digital clocks
- Menu systems
- Status indicators
- Wearable electronics
Compatibility
- Arduino: All Arduino boards (Uno, Nano, ESP32, etc.)
- Raspberry Pi: All models (requires I2C enable)
- ESP8266/ESP32: Native I2C support
- STM32: Compatible with HAL I2C libraries
- Microcontrollers: Any MCU with I2C capability
Libraries & Resources
- Arduino: Adafruit SSD1306 library
- CircuitPython: adafruit_ssd1306
- Raspberry Pi: luma.oled library
- Documentation: SSD1306 datasheet available online
- I2C Address: Typically 0x3C or 0x3D
Interface Requirements
- Power Supply: 3.3V or 5V regulated
- I2C Pullups: Usually built-in on development boards
- Pin Headers: Requires soldering for breadboard connections
- Current: Ensure adequate power supply capacity
Notes
- No Pin Headers: Displays come without headers, soldering required
- I2C Address: Check address with I2C scanner if multiple devices
- Power Consumption: Lower when fewer pixels are lit
- Lifespan: OLED displays may dim over extended continuous use
- Fragile: Handle carefully, OLED screens can crack easily
- Static Sensitive: Use anti-static precautions during handling
Usage Tips
- Solder 4-pin header for easy breadboard prototyping
- Use pull-up resistors if not present on your development board
- Start with lower brightness settings to extend display life
- Consider sleep modes for battery-powered applications
- Test I2C address before connecting multiple I2C devices
Programming Examples
- Display text and graphics
- Real-time sensor data visualization
- Menu navigation systems
- Progress bars and status indicators
- Simple animations and scrolling text
Tags
oled-display, i2c, ssd1306, blue, 128x32, frienda, arduino, raspberry-pi